
기존에 리액트+스프링부트 연동으로 작업하던 taskHelper에서 시간표 프로그램을 작업하기 위해, 다시 한번 개발환경 세팅을 정리하고자 한다. 이 글에서는 스프링부트 + 리액트 + 데이터베이스 연결까지를 다룬다. 혹여 이 글을 볼 사람 중 단순히 연동만을 하고 싶은 사람이 있다면 완전 기본 세팅이 아니라 기존 개발과정을 합쳐둔 글이기 때문에, 리액트 연동 부분만 보길 권장한다.
우선 리액트를 사용하기 위해 Node.js를 설치해야 한다.
Node.js — Run JavaScript Everywhere (nodejs.org)
Node.js — Run JavaScript Everywhere
Node.js® is a JavaScript runtime built on Chrome's V8 JavaScript engine.
nodejs.org
LTS 버전으로 설치한다.
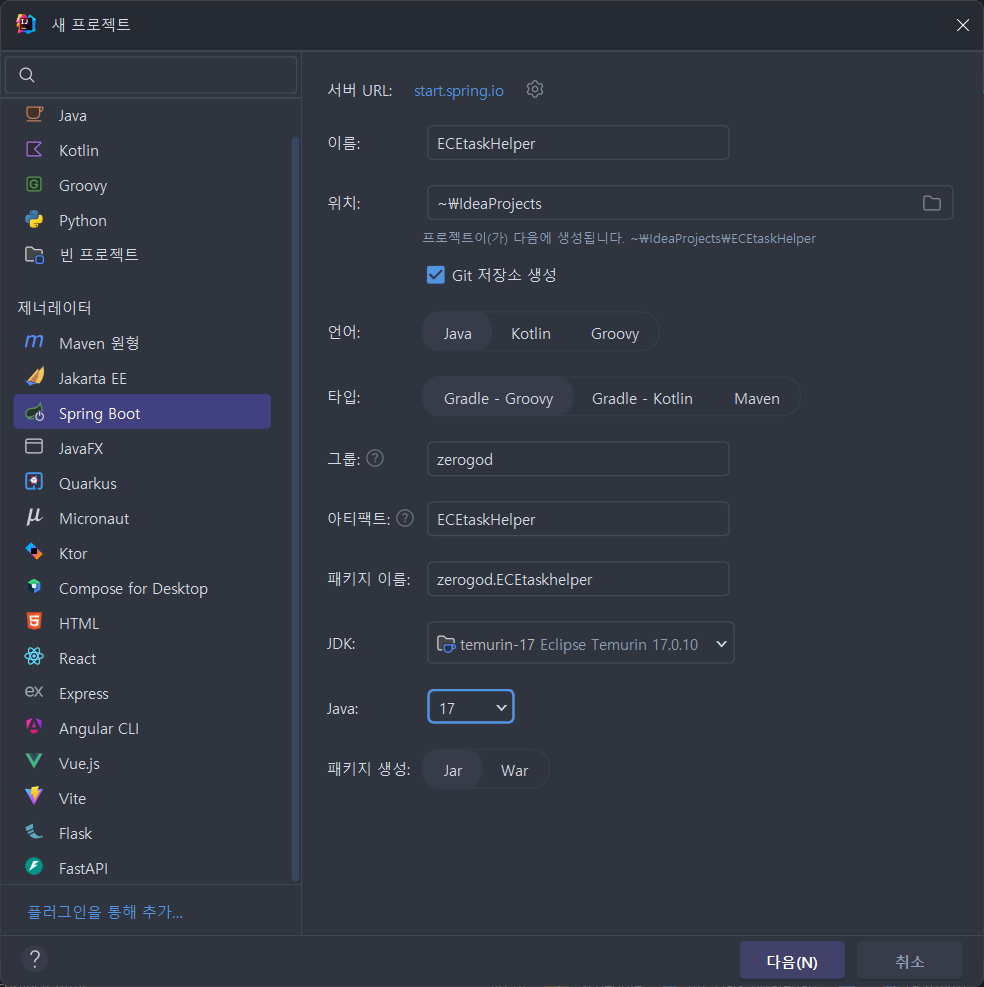
기존과 동일하게 스프링부트 프로젝트를 생성한다. 어차피 전자과에서만 쓸 웹이니 프로젝트명은 ECEtaskHelper로 새로 생성한다.
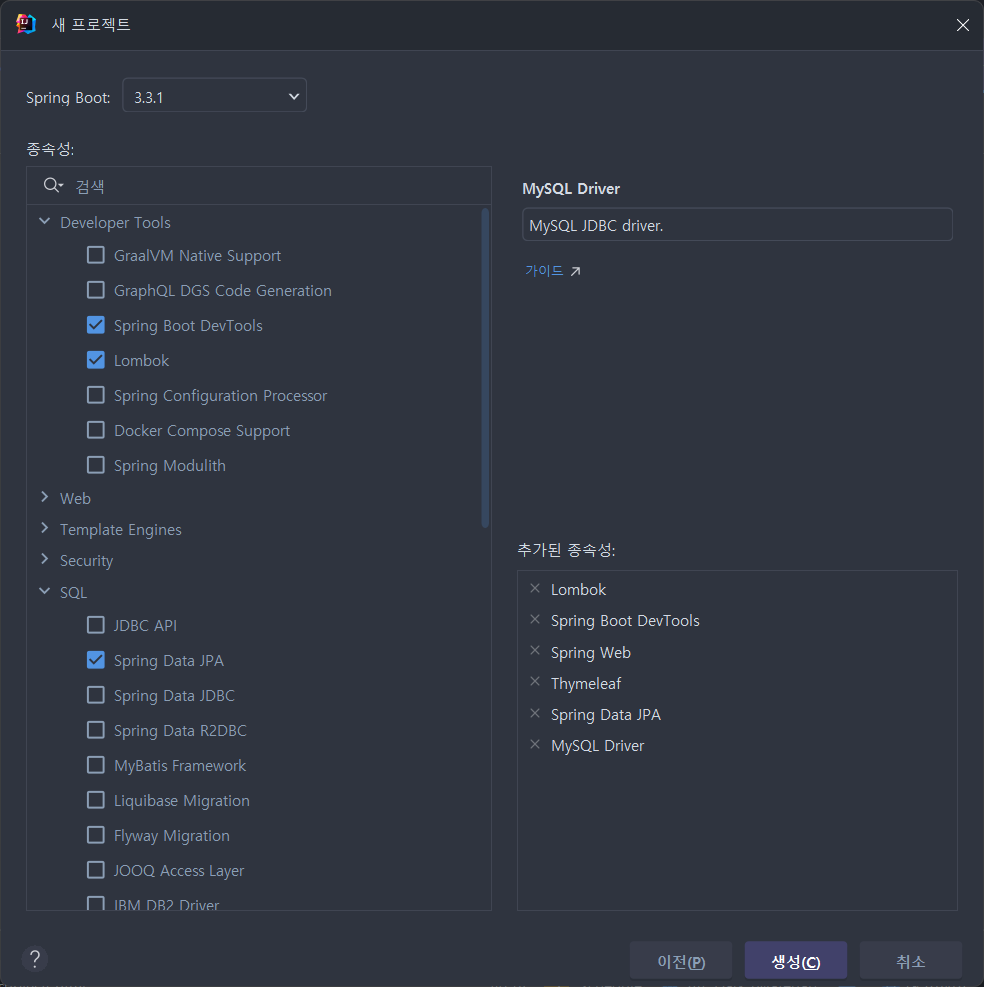
종속성은 데이터베이스를 비롯해 위와 같 추가하였다. 이전 스프링부트 개발환경 글에서는 사후적으로 설정하였으나, 이번에는 어차피 사용할 거 한번에 추가하도록 한다. 프로젝트 생성 후, 이전과 같이 데이터베이스를 먼저 연동해준다.
만들고 보니 application properties에서 다음 내용은 필요가 없다.
spring.thymeleaf.prefix=classpath:/templates/
spring.thymeleaf.suffix=.html
spring.thymeleaf.check-template-location=true
spring.thymeleaf.cache=false
spring.devtools.restart.enabled=true위 내용은 thymleaf 템플릿과 관련된 내용으로, 리액트는 클라이언트 사이드 프레임워크이기 때문에, 서버 사이드 HTML 렌더링에 사용되는 thymleaf는 필요없다. 즉, 위 종속성에서 thymleaf는 필요하지 않다.
동일하게 데이터베이스 정보를 입력해준다.
spring.application.name=ECEtaskHelper

spring.datasource.driver-class-name=com.mysql.cj.jdbc.Driver
spring.datasource.url=jdbc:mysql://localhost:3306/schedule?serverTimezone=UTC&characterEncoding=UTF-8
spring.datasource.username=root
spring.datasource.password=2580*

spring.jpa.hibernate.ddl-auto=none
spring.jpa.show-sql=true
spring.jpa.properties.hibernate.format_sql=true
spring.jpa.properties.hibernate.dialect=org.hibernate.dialect.MySQL8Dialect
build.gradle의 종속성은 프로젝트 생성 시 필요한 요소들을 추가했기에 변경할 사항은 없다..
dependencies {
    implementation 'org.springframework.boot:spring-boot-starter-data-jpa'
    implementation 'org.springframework.boot:spring-boot-starter-thymeleaf'
    implementation 'org.springframework.boot:spring-boot-starter-web'
    compileOnly 'org.projectlombok:lombok'
    developmentOnly 'org.springframework.boot:spring-boot-devtools'
    runtimeOnly 'com.mysql:mysql-connector-j'
    annotationProcessor 'org.projectlombok:lombok'
    testImplementation 'org.springframework.boot:spring-boot-starter-test'
    testRuntimeOnly 'org.junit.platform:junit-platform-launcher'
}
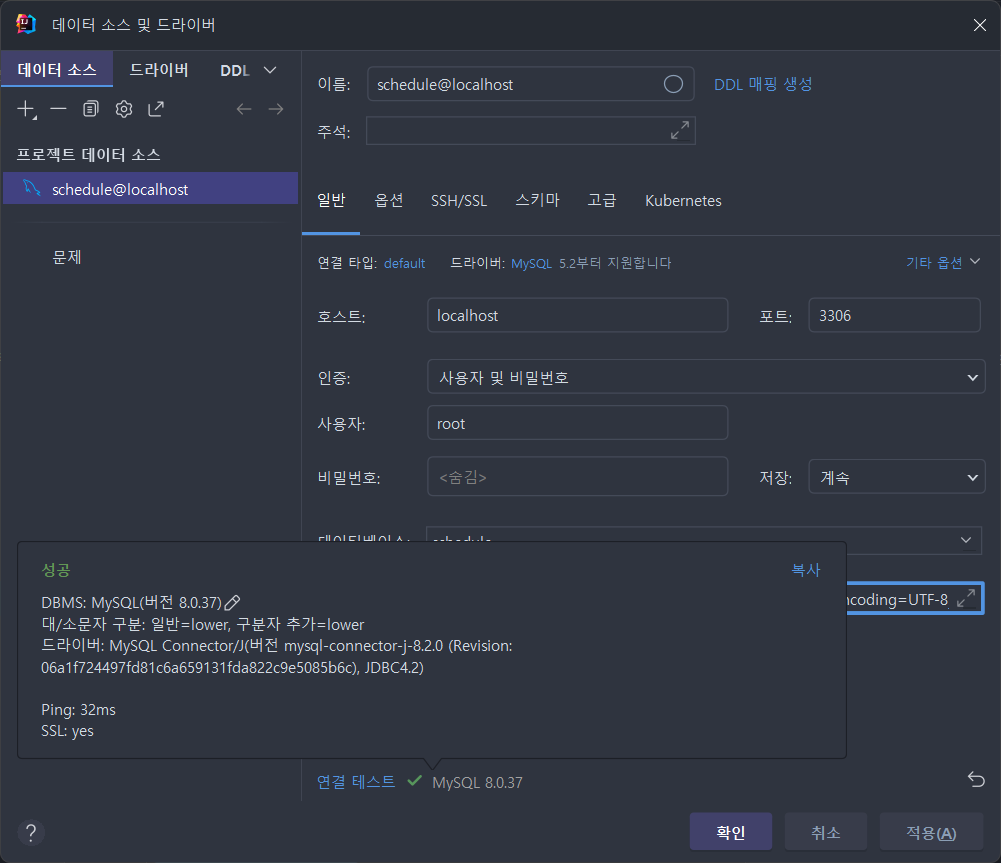
데이터 소스를 추가한다. 위와 같이 정상적으로 연결되면 메시지가 출력된다.
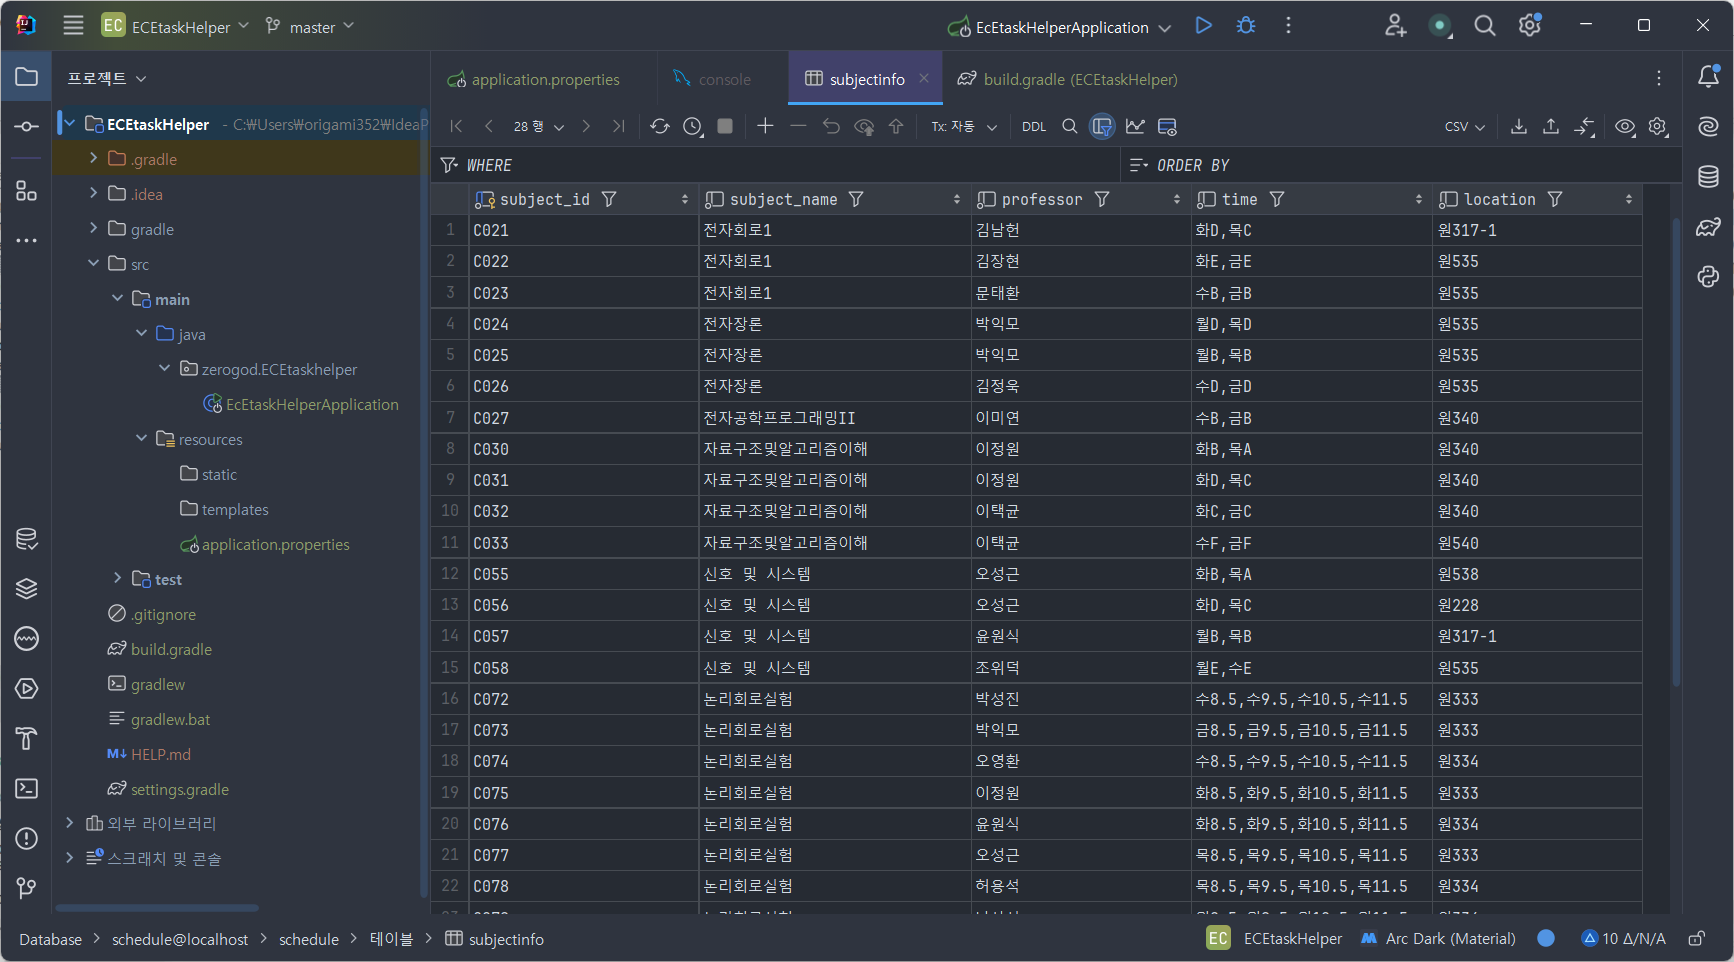
현재까지 잘 수행 했다면 다음과 같이 데이터베이스 정보를 확인할 수 있다.
이제 필요한 패키지와 클래스를 추가한다.
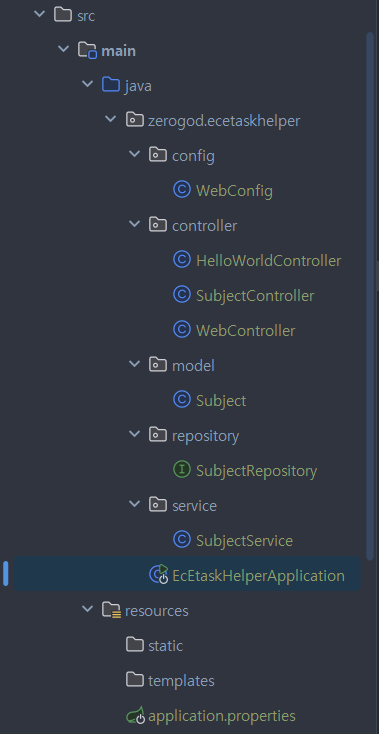
위와 같이 필요한 클래스들만 생성하였다. 각 클래스들의 내용은 다음과 같다.
1. WebConfig
package zerogod.ecetaskhelper.config;

import org.springframework.context.annotation.Bean;
import org.springframework.context.annotation.Configuration;
import org.springframework.web.client.RestTemplate;

@Configuration
public class WebConfig {
    @Bean
    public RestTemplate restTemplate() {
        return new RestTemplate();
    }
}RestTemplate은 스프링 부트 애플리케이션에서 외부 HTTP 서비스와의 통신을 위해 사용된다. WebConfig에서 RestTemplate을 빈으로 등록하면 필요할 때 언제든지 주입받아 사용할 수 있으며, 코드의 유연성과 확장성을 증가시킬 수 있다. 추가적으로, RestTemplate은 다양한 HTTP 메소드 지원과 URL 변수 치환, 응답 타입 변환 등을 쉽게 처리할 수 있어 백엔드 개발에 있어 매우 유용하다고 한다. 천천히 공부해가는 입장이기에 이정도만 정리.
2. HelloWorldController
package zerogod.ecetaskhelper.controller;

import org.springframework.web.bind.annotation.GetMapping;
import org.springframework.web.bind.annotation.RestController;

@RestController
public class HelloWorldController {

    @GetMapping("/api/hello")
    public String test() {
        System.out.println("API /api/hello was called");
        return "Hello, world!";
    }
}리액트와 백엔드의 통신을 테스트하기 위한 클래스이다. 뒤에서 설명할 리액트와 연동이 잘 되었다면, 이 클래스를 통해 데백엔드 데이터를 불러올 수 있다.
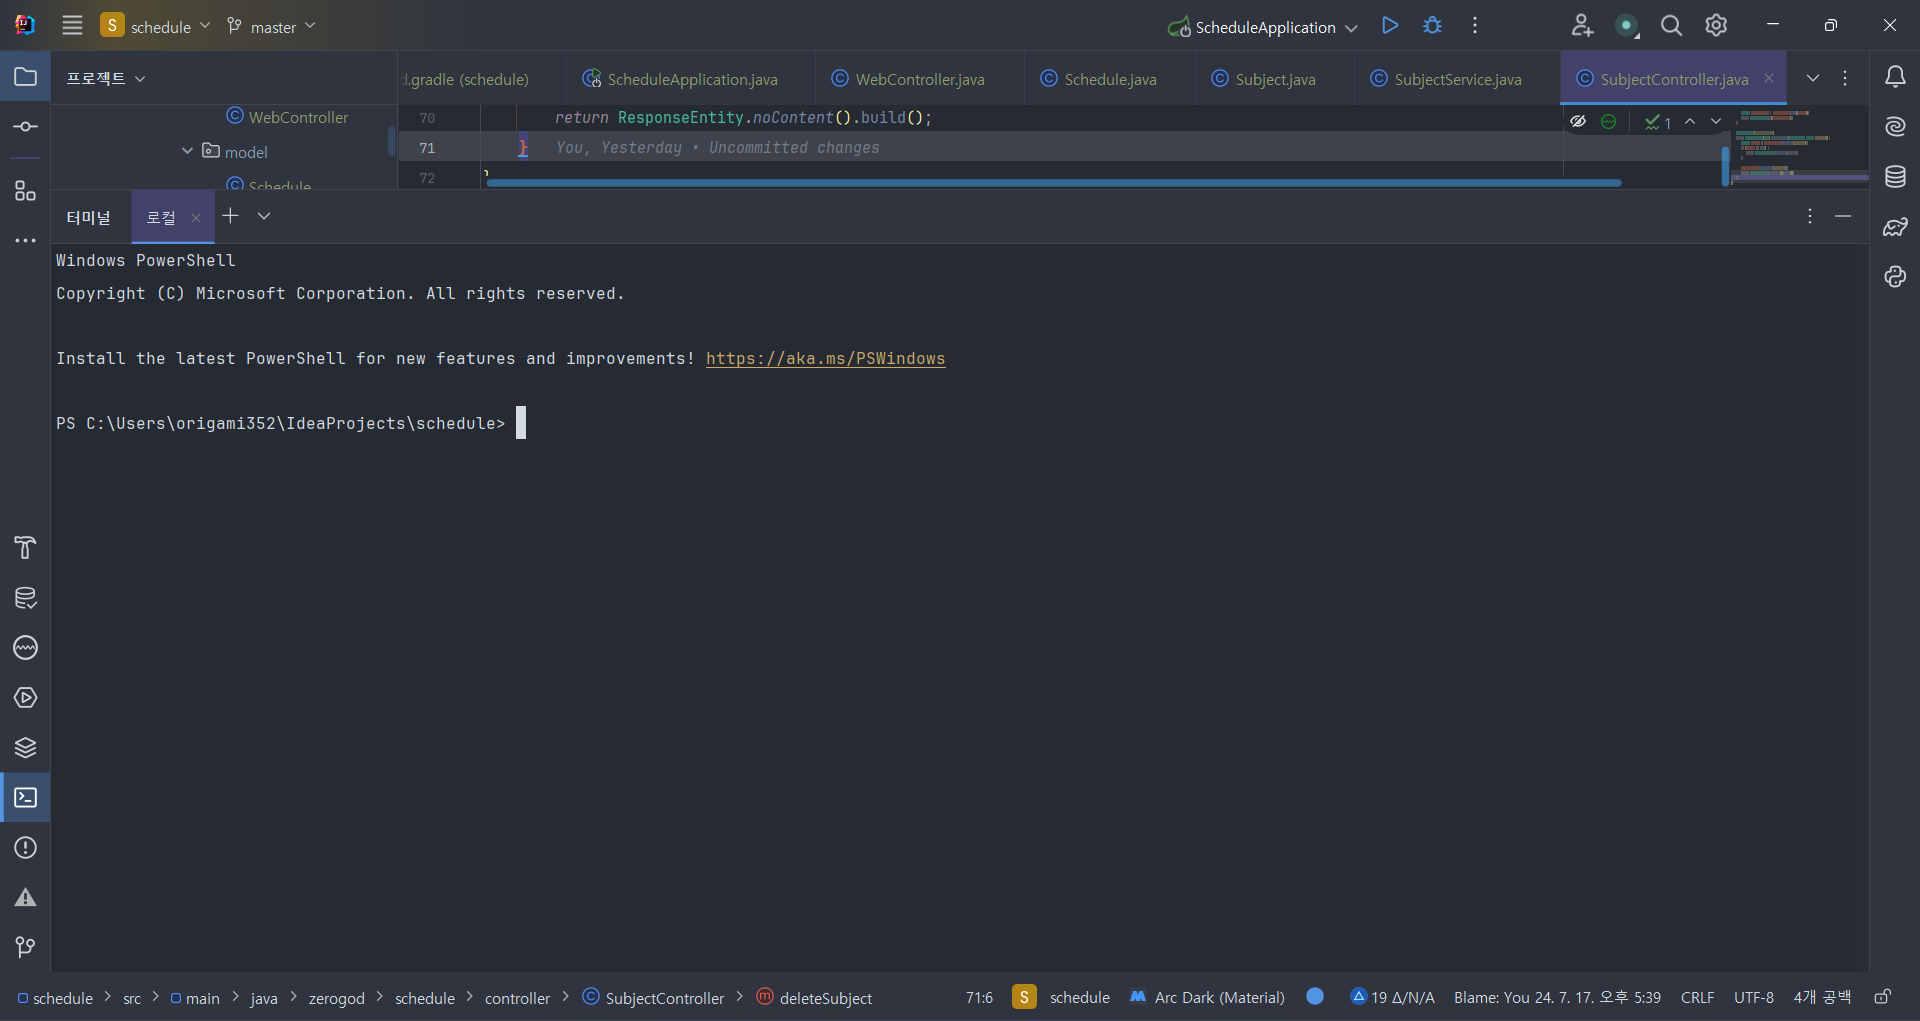
3. SubjectController
package zerogod.ecetaskhelper.controller;

import zerogod.ecetaskhelper.service.SubjectService;
import zerogod.ecetaskhelper.model.Subject;
import org.springframework.beans.factory.annotation.Autowired;
import org.springframework.http.ResponseEntity;
import org.springframework.web.bind.annotation.*;

import java.util.List;

@RestController
@RequestMapping("/api/subjects")
public class SubjectController {

    private final SubjectService subjectService;

    @Autowired
    public SubjectController(SubjectService subjectService) {
        this.subjectService = subjectService;
    }

    @GetMapping
    public List<Subject> getAllSubjects() {
        return subjectService.findAll();
    }

    // 과목명으로 검색
    @GetMapping("/search")
    public List<Subject> searchSubjectsByName(@RequestParam String name) {
        return subjectService.findByNameContaining(name);
    }

    @GetMapping("/{subjectId}")
    public ResponseEntity<Subject> getSubjectById(@PathVariable String subjectId) {
        Subject subject = subjectService.findById(subjectId);
        if (subject == null) {
            return ResponseEntity.notFound().build();
        }
        return ResponseEntity.ok(subject);
    }

    @PostMapping
    public Subject createSubject(@RequestBody Subject subject) {
        return subjectService.save(subject);
    }

    @PutMapping("/{subjectId}")
    public ResponseEntity<Subject> updateSubject(@PathVariable String subjectId, @RequestBody Subject subjectDetails) {
        Subject subject = subjectService.findById(subjectId);
        if (subject == null) {
            return ResponseEntity.notFound().build();
        }

        subject.setSubjectName(subjectDetails.getSubjectName());
        subject.setProfessor(subjectDetails.getProfessor());
        subject.setTime(subjectDetails.getTime());
        subject.setLocation(subjectDetails.getLocation());

        Subject updatedSubject = subjectService.save(subject);
        return ResponseEntity.ok(updatedSubject);
    }

    @DeleteMapping("/{subjectId}")
    public ResponseEntity<Void> deleteSubject(@PathVariable String subjectId) {
        Subject subject = subjectService.findById(subjectId);
        if (subject == null) {
            return ResponseEntity.notFound().build();
        }

        subjectService.deleteById(subjectId);
        return ResponseEntity.noContent().build();
    }
}SubjectController는 기본적으로 사용되는 Mapping들을 설정하였다. 사용하지 않을 것들도 있지만 우선 넣어두고 전체적인 기능이 완료되면 적절히 수정/삭제하고자 한다.
4. WebController
package zerogod.ecetaskhelper.controller;

import org.springframework.stereotype.Controller;
import org.springframework.web.bind.annotation.GetMapping;

@Controller
public class WebController {

    @GetMapping("/")
    public String index() {
        // 모든 요청을 리액트의 index.html 파일로 forward
        return "forward:/index.html";
    }
}리액트는 클라이언트 측에서 라우팅과 렌더링을 관리한다. 리액트를 사용하면 서버는 API 엔드포인트를 제공하는 역할을 하고, 프론트엔드의 모든 페이지 라우팅은 리액트에 의해 처리된다. 모든 요청을 리액트의 index.html로 포워딩하면 모든 초기 페이지 로드 및 라우팅을 리액트가 담당하게 된다.
5. Subject
package zerogod.ecetaskhelper.model;

import jakarta.persistence.*;
import lombok.Getter;
import lombok.NoArgsConstructor;
import lombok.Setter;

import java.util.Arrays;
import java.util.List;
import java.util.ArrayList;

@Getter
@NoArgsConstructor
@Entity
@Table(name = "subjectinfo")
public class Subject {
    public Subject(String subjectId, String subjectName, String professor, String time, String location) {
        this.subjectId = subjectId;
        this.subjectName = subjectName;
        this.professor = professor;
        this.time = time;
        this.location = location;
    }

    @Id
    @Column(name = "subject_id", nullable = false)
    private String subjectId;

    @Setter
    @Column(name = "subject_name", nullable = false)
    private String subjectName;

    @Setter
    @Column(name = "professor", nullable = false)
    private String professor;

    @Setter
    @Column(name = "time", nullable = false)
    private String time;

    @Setter
    @Column(name = "location", nullable = false)
    private String location;

    public List<String> getTimes() {
        if (time == null || time.isEmpty()) {
            return new ArrayList<>();
        }
        return Arrays.asList(time.split(","));
    }
}Subject 클래스는 동일하다. 데이터베이스의 구조와 내용이 완전히 동일하기 때문에 그대로 사용한다. 다만 @Setter을 subjectId를 제외한 필드에서만 사용하도록 설정하였는데, 이는 Setter은 데이터를 변경하기 때문에 필요한 경우에만 사용하는 것이 옳다고 한다.
6. SubjectRepository
package zerogod.ecetaskhelper.repository;

import org.springframework.data.jpa.repository.JpaRepository;
import org.springframework.stereotype.Repository;
import zerogod.ecetaskhelper.model.Subject;

import java.util.List;

@Repository
public interface SubjectRepository extends JpaRepository<Subject, String> {
    List<Subject> findBySubjectNameContaining(String name);
}repository 인터페이스도 동일하다, 다만, 시간표 기능에서 과목 검색을 위한 추상 메소드를 추가하였다.
7. SubjectService
package zerogod.ecetaskhelper.service;

import zerogod.ecetaskhelper.model.Subject;
import zerogod.ecetaskhelper.repository.SubjectRepository;
import org.springframework.beans.factory.annotation.Autowired;
import org.springframework.stereotype.Service;

import java.util.List;

@Service
public class SubjectService {
    private final SubjectRepository subjectRepository;

    @Autowired
    public SubjectService(SubjectRepository subjectRepository) {
        this.subjectRepository = subjectRepository;
    }

    public List<Subject> findAll() {
        return subjectRepository.findAll();
    }

    public Subject findById(String subjectId) {
        return subjectRepository.findById(subjectId).orElse(null);
    }

    public List<Subject> findByNameContaining(String name) {
        return subjectRepository.findBySubjectNameContaining(name);
    }

    public Subject save(Subject subject) {
        return subjectRepository.save(subject);
    }

    public void deleteById(String subjectId) {
        subjectRepository.deleteById(subjectId);
    }
}
CRUD 작업을 수행하는 Service 클래스이다.
이제 리액트를 설치한다.
다음과 같이 콘솔을 열고
cd src/main디렉토리 지정해주고
npx create-react-app frontend리액트 설치
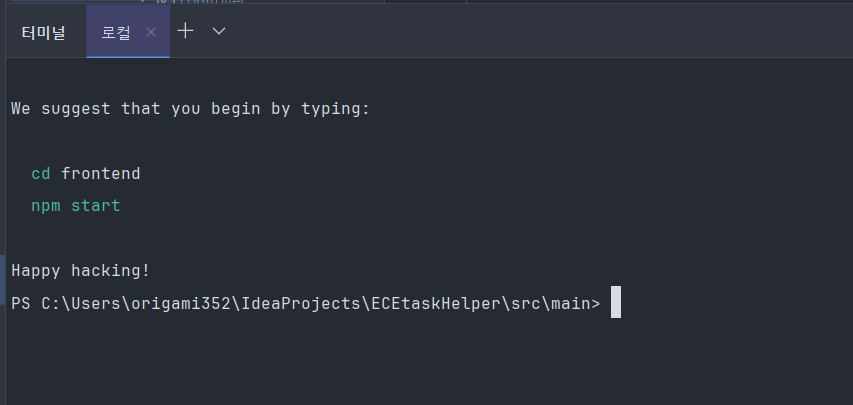
설치가 완료되면 위와 같이 Happy hacking!이 출력된다.
react는 기본 포트가 3030, springboot는 기본 포트가 8080이기 때문에 이를 8080으로 통일해준다. (CORS 오류 해결)
CORS(교차 출처 리소스 공유, Cross-Origin Resource Sharing) 오류
웹 애플리케이션 개발 중에 자주 발생하는 문제 중 하나입니다. 이 오류는 다음과 같은 상황에서 발생할 수 있습니다.
출처 (Origin)의 제한: 웹 브라우저는 보안 상의 이유로 동일한 출처에서 로드한 리소스만이 다른 출처의 리소스에 접근할 수 있도록 제한합니다. 출처란 프로토콜 (http 또는 https), 호스트 (도메인), 포트로 정의됩니다. 따라서 다른 출처에서 리소스를 요청하려 할 때 CORS 오류가 발생할 수 있습니다.
다음으로 src/main/frontend에 middleware 모듈을 설치한다.
npm install http-proxy-middleware --save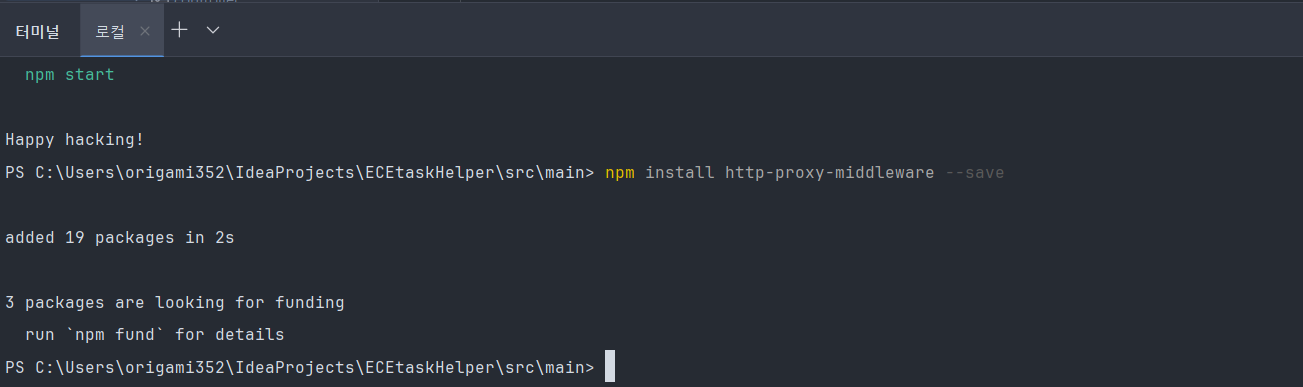
위 이미지에서 src/main에 설치를 하고 있는데, src/main/frontend에서 해야 한다.
src/main/frontend/src 디렉토리에 setupProxy.js 파일을 생성하고 다음 코드를 붙여넣기 한다.
const { createProxyMiddleware } = require('http-proxy-middleware');

module.exports = function(app) {
    app.use(
        createProxyMiddleware({
            target: 'http://localhost:8080',
            changeOrigin: true,
            pathFilter : '/api',
        })
    );
};위 코드는 프론트엔드, 즉 리액트 클라이언트에서 /api로 요청을 보내면 백엔드 포트인 8080으로 도착하도록 한다.
다음으로 axios를 설치한다. src/main/frontend 에서 axios를 설치한다.
npm install axios --save
src/main/frontend/src/App.js의 내용을 지우고 아래 코드를 붙여넣기 한다.
build.gradle 파일에 아래 코드를 추가한다.
def frontendDir = "$projectDir/src/main/frontend"

sourceSets {
    main {
        resources { srcDirs = ["$projectDir/src/main/resources"]
        }
    }
}

processResources { dependsOn "copyReactBuildFiles" }

tasks.register('installReact', Exec) {
    workingDir "$frontendDir"
    inputs.dir "$frontendDir"
    group = BasePlugin.BUILD_GROUP
    if (System.getProperty('os.name').toLowerCase(Locale.ROOT).contains('windows')) {
        commandLine "npm.cmd", "audit", "fix"
        commandLine 'npm.cmd', 'install'
    } else {
        commandLine "npm", "audit", "fix" commandLine 'npm', 'install'
    }
}

tasks.register('buildReact', Exec) {
    dependsOn "installReact"
    workingDir "$frontendDir"
    inputs.dir "$frontendDir"
    group = BasePlugin.BUILD_GROUP
    if (System.getProperty('os.name').toLowerCase(Locale.ROOT).contains('windows')) {
        commandLine "npm.cmd", "run-script", "build"
    } else {
        commandLine "npm", "run-script", "build"
    }
}

tasks.register('copyReactBuildFiles', Copy) {
    dependsOn "buildReact"
    from "$frontendDir/build"
    into "$projectDir/src/main/resources/static"
}위 코드는 springboot 프로젝트가 실행될 때 자동으로 react 프로젝트가 먼저 빌드되고 그 결과를 springboot 프로젝트에 포함시킨다. 아래 명령어를 터미널에서 홈 디렉터리 입력해 빌드해준다.
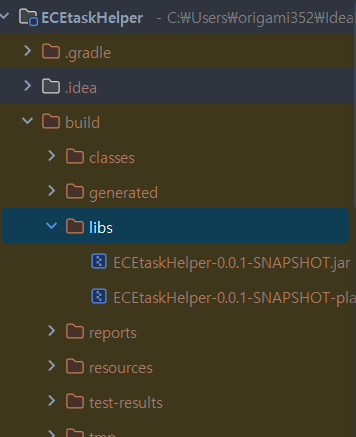
./gradlew build빌드가 완료되면 아래와 같이 build/libs에 jar파일이 생성된다.
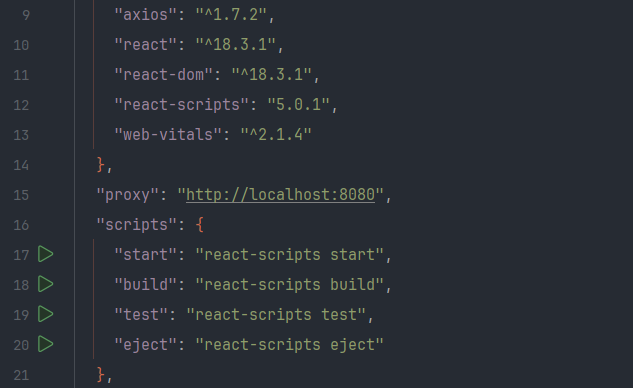
다음으로 src/main/frontend에서 package.json 파일에 다음 코드를 추가한다.
"proxy": "http://localhost:8080",
이제 리액트를 먼저 실행해본다. src/main/frontend 에서 다음 명령어를 실행한다.
npm start

안된다.
DeprecationWarning: 'onBeforeSetupMiddleware' option is deprecated. Please use the 'setupMiddlewares' option. 에러를 수정한다.
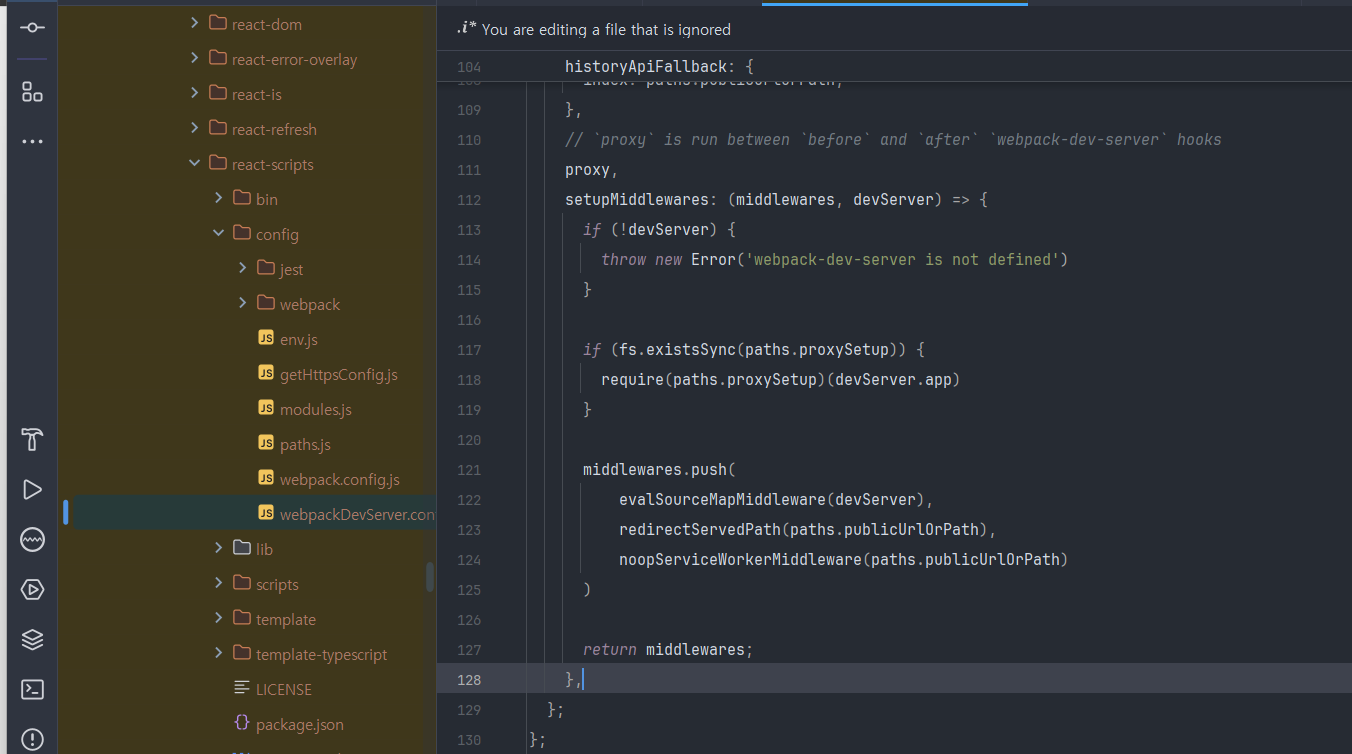
node_modules\react-scripts\config\webpackDevServer.config.js에서 proxy, 아래 두 함수를 아래 함수로 바꿔준다.
setupMiddlewares: (middlewares, devServer) => {
  if (!devServer) {
      throw new Error('webpack-dev-server is not defined')
  }

  if (fs.existsSync(paths.proxySetup)) {
      require(paths.proxySetup)(devServer.app)
  }

  middlewares.push(
      evalSourceMapMiddleware(devServer),
      redirectServedPath(paths.publicUrlOrPath),
      noopServiceWorkerMiddleware(paths.publicUrlOrPath)
  )

  return middlewares;
},
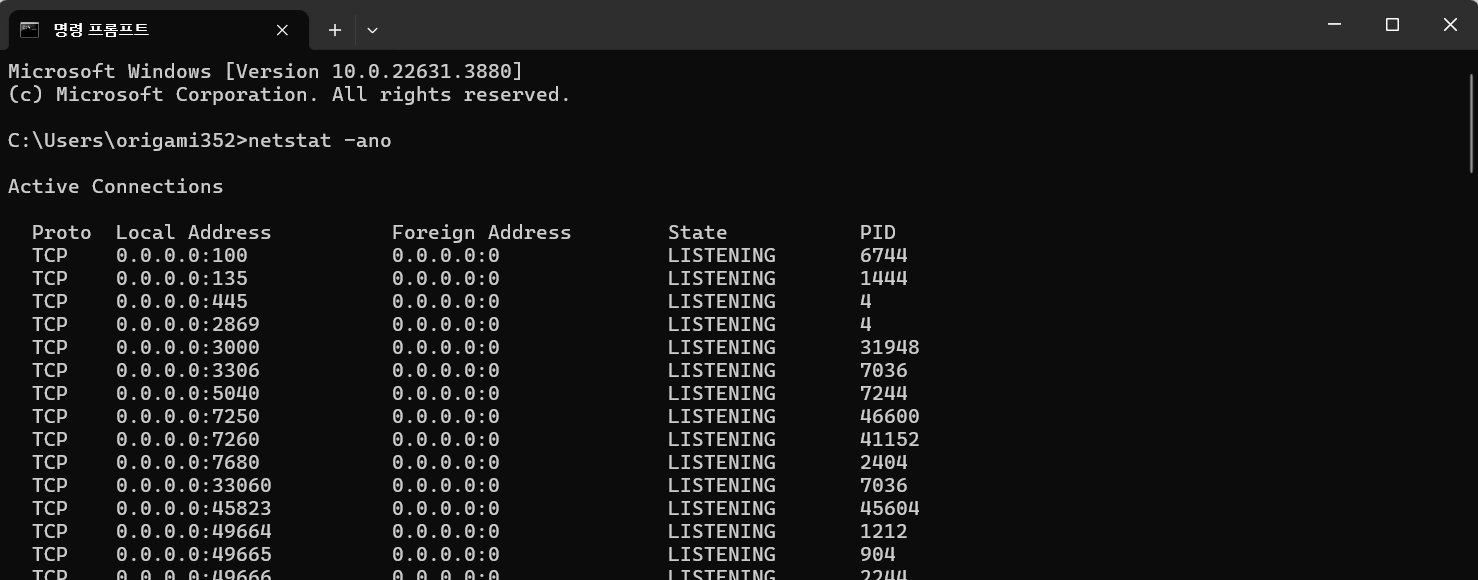
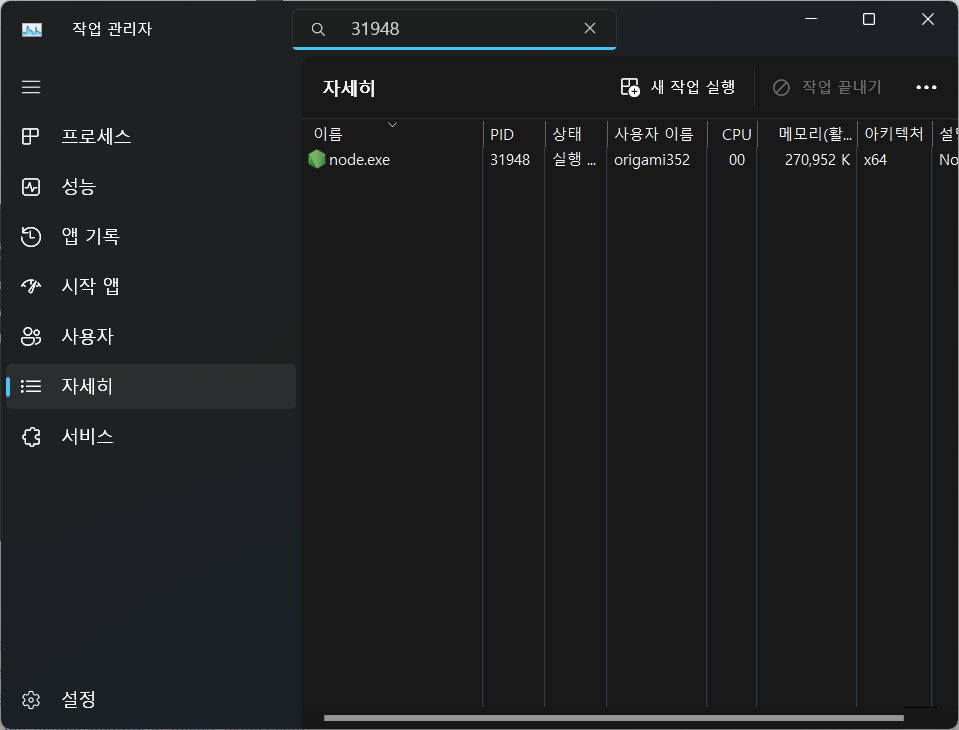
cmd에서 3000번 포트를 사용하고 있는 PID를 확인하고 작업관리자에서 작업 끝내기를 해준다.
이제 다시한번 리액트와 스프링부트 실행.
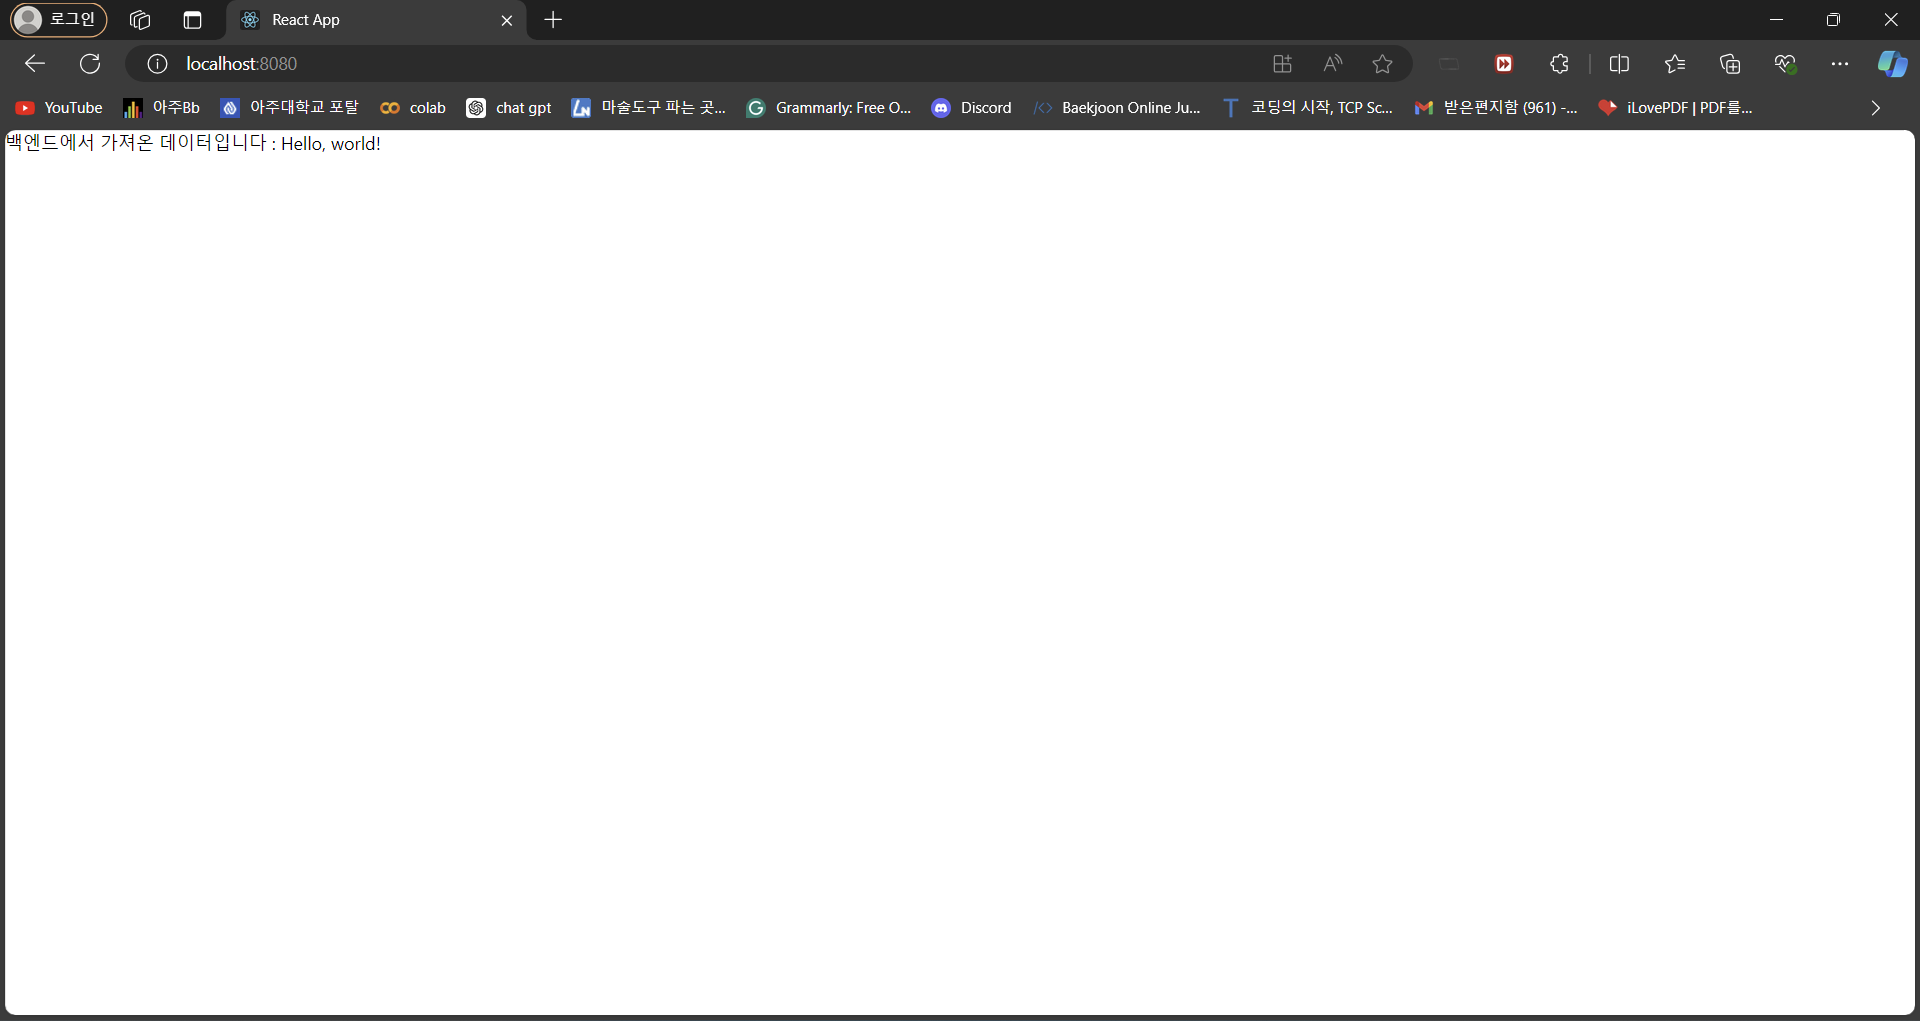
8080 포트에서 정상적으로 실행되고 있는 것을 확인할 수 있다. 본격적인 시간표 기능 추가 및 UI 구현은 ECEtaskHelper 글에서 정리하도록 한다.
참고자료 및 출처:
[JPA] Entity 클래스 설정 & 주의점 : 네이버 블로그 (naver.com)
Spring Boot + React.js 개발환경 연동하기 (velog.io)
[Spring Boot + React] 개발환경 연동 (velog.io)
'개발환경' 카테고리의 다른 글
| [개발환경] Android Studio 설치 및 테스트 (0) | 2025.01.15 |
|---|---|
| [개발환경] CLion 설치 및 설정 (0) | 2024.12.26 |
| MariaDB 설치 및 SpringBoot 연결 (0) | 2024.08.18 |
| IntelliJ에서 Python Flask 프로젝트 설정하기 (1) | 2024.08.14 |
| IntelliJ IDEA 스프링부트(Springboot) 개발환경 세팅 (+ MySQL 설정) (0) | 2024.07.16 |